
FlashForge: connection tutorial
FlashForge printers connect over your local network only — there is no cloud option. What you need from the touchscreen depends on how Tiger Studio finds the printer:
- Found by the network scan: the Printer ID only — step 3.
- Added by hand: the serial number and IP address (step 2), plus the Printer ID (step 3).
See FlashForge compatibility for the rest of the integration.
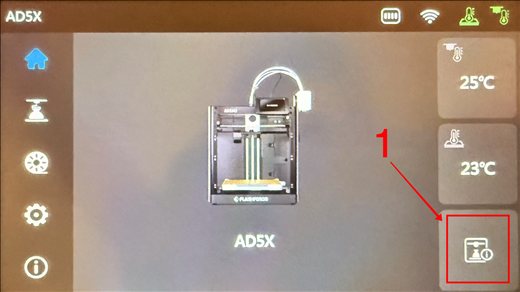
Step 1. On the main interface, tap the "Basic Info" button at the bottom right of the screen.
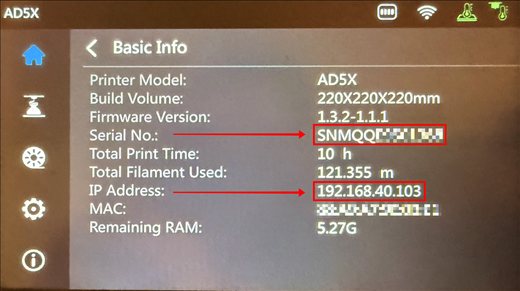
Step 2. In the Basic Info page, retrieve the Serial No. and the IP Address.
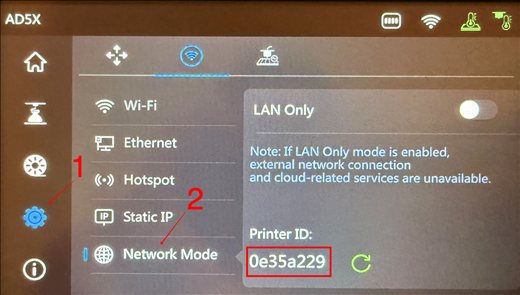
Step 3. Select the gear icon, tap "Network Mode", then retrieve the Printer ID.
One value, two names. The printer calls it Printer ID; Tiger Studio’s form calls it Password. The Printer ID is what you type there.